User Guide Keyframe Moviemaker 2.1
New ! Keyframe Animation 2.2 New !
Keyframe Moviemaker has been fully integrated into Keyframe Animation 2.2.
Recommend you upgrade to Keyframe Animation 2.2.
Background
SketchUp has a utility to export animations, but it only exports its own native scene animation, and ignores the Keyframe object animation. Keyframe Moviemaker 2.1 was designed to work with Keyframe Animation 2.1+. Once you set up the object animation (using Keyframe Animation 2.x), then you can use Keyframe Moviemaker to export the object animation.
Keyframe Moviemaker 2.1 also exports the SketchUp scene animation. It plays nice with all the scene properties.
- Camera Location
- Hidden Geometry
- Visible Layers
- Section Planes
- Style and Fog
- Shadow Settings
There are several video codecs and formats that you can choose from when you export the animation.
- H.264 codec (
.mp4) - VP8 codec (
.webm) - VP9 codec (
.webm) - Theora codec (
.ogg) - Animated GIF (
.gif) - Windows Media Video (
.wmv) - Microsoft MPEG-4 v2 (
.avi) - Lossless (
.avi) - Uncompressed (
.avi)
The main advantage of Keyframe Moviemaker is that it exports the animation directly from the keyframe model. You no longer have to create the tweens model to export the object animation. This new approach is fast, simple, and far more efficient than creating the resource intensive tweens.
This is bascially the same video export feature that was in Keyframe Animation 2.0. We are releasing it as a separate plugin for Keyframe Animation 2.1+ users. It can be activated with any Keyframe Animation license purchased before September 1, 2019. So, anyone with a license for Keyframe Animation 2.0 (or 1.9) can upgrade to Keyframe Animation 2.1 and get Keyframe Moviemaker for free.
Menu Overview
All features are accessible from the menu, Plugins > Keyframe Moviemaker.
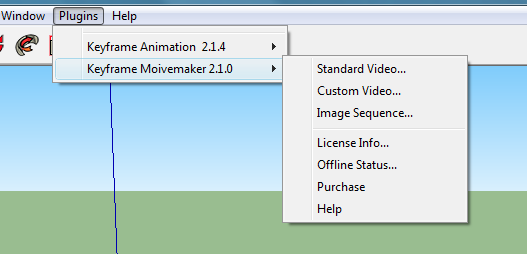
| Standard Video... | Exports the animation to a video with a standard frame size and frame rate. |
| Custom Video... | Exports the animation to a video with a custom frame size up to 3840 x 2160 pixels, and frame rate up to 60 fps. |
| Image Sequence... | Exports the individual frames of the animation as a sequence of images. |
| License Info... | Display User Info, Trial Info, and License Info. Activate a free trial. Register a license. |
| Offline Status... | See if you are online or offline, and how much time you have left to use SketchUp offline. |
| Purchase | Open the Keyframe Moviemaker Purchase page in your browser. |
| Help | Open the Keyframe Moviemaker 2.1 User Guide in your browser. |
Exporting the Animation
Once your animation is set up, you can export it to a standard video, custom video, or an image sequence.
Exporting a Standard Video (PC only)
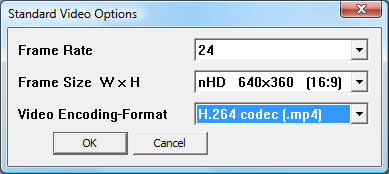
Access via the menu, Plugins > Keyframe Moviemaker > Standard Video....
You can quickly choose from over a dozen common frame sizes having a 4:3 or 16:9 aspect ratio.
There are several video codecs and formats to choose from.
- H.264 codec (
.mp4) - VP8 codec (
.webm) - VP9 codec (
.webm) - Theora codec (
.ogg) - Animated GIF (
.gif) - Windows Media Video (
.wmv) - Microsoft MPEG-4 v2 (
.avi) - Lossless (
.avi) - Uncompressed (
.avi)
Exporting a Custom Video (PC only)
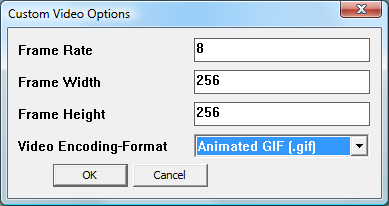
Access via the menu, Plugins > Keyframe Moviemaker > Custom Video....
Choose a custom Frame Rate from 1 to 60 frames per second.
Choose a custom Frame Size from 8x8 to 3840x2160 pixels.
The Video Encoding-Format options are the same as the Standard Video export.
Exporting an Image Sequence (PC and Mac)
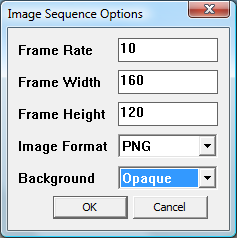
Access via the menu, Plugins > Keyframe Moviemaker > Image Sequence....
The Frame Rate can go from 1 to 60 frames per second.
The Frame Size can go from 8x8 to 3840x2160 pixels.
The Image Format has a drop-down list to choose from JPG, PNG, TIF, or BMP.
The Background is always opaque for .jpg, .tif, and .bmp image types.
However, if you are exporting .png type images, then the background can be either opaque or transparent.
The Export Process
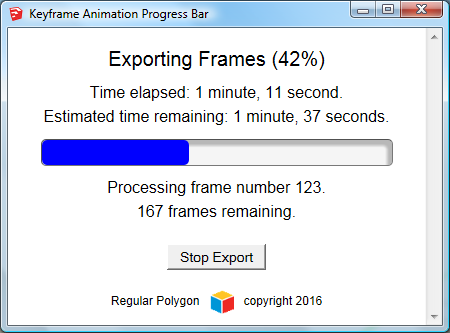
The Progress Dialog displays the time elapsed and the estimated time remaining, and generally makes the export process more user friendly.
The export process is also much more controlled. SketchUp no longer hangs forever while you watch the spinning ball, as was the case when generating the tweens. Click the Stop Export button to interrupt the frame processing at any time. You can resume it later, or stop and quit.
If you quit, the frames that have already been generated are saved in a folder. The next time you export the animation, with the same settings, you can reuse those frames.
You can even export half the frames one day, quit, close SketchUp, reopen it some other day, and pick up where you left off.
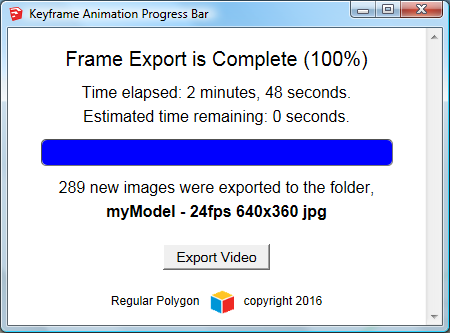
The frame folder is given a name based on the model name, the frame rate, the frame size, and the type of images exported. The folder is located in the same directory as the SketchUp model.
A typical frame folder name is, myModel - 24fps 640x360 jpg.
If you are exporting an image sequence, once the frame export is complete, that is the end of the process. Close the Progress Bar window.
If you are exporting a video, there will be an Export Video button. Click it to run a program that compresses the frames into a video with the encoding and format that were selected.
Tip: Exporting videos with different formats.
You only need to generate all the frames once for a particular frame size and frame rate.
After that, you can reuse the same frames to export videos with different formats and encodings.
For example, H.264 codec (.mp4), VP8 or VP9 (.webm), Animated GIF (.gif),
Lossless or Uncompressed (.avi), etc.
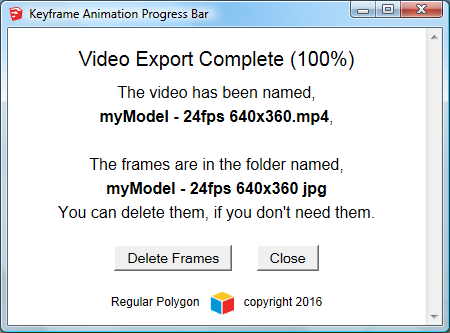
The video file is given a name based on the model name, the frame rate, and the frame size. It is located in the same folder as the SketchUp model.
A typical video file name is, myModel - 24fps 640x360.mp4.
Once the video is created, the Progress Bar window displays the name of the video file and the frames folder.
If you don't need the frames for anything else, you can delete them and the folder by clicking the Delete Frames button.
And that's it; the animation is exported. Much more simple than the old way of generating all those tweens. The animations can probably be much longer with this new approach too.
Caveat (Mac only)
Exporting the animation to a video is not yet supported on the Mac. Currently, the only way to export the animation on the Mac is as an image sequence. A video can be created from the image sequence using third-party software.
License Management
Keyframe Moviemaker can be activated with any Keyframe Animation license purchased before September 1, 2019. Beginning sometime in September 2019, it will be possible to purchase a license specifically for Keyframe Moviemaker.
The license management system has several features to make everything about the license process simple and unobtrusive.
- The system supports SketchUp 8+.
- It is no longer necessary to remove the license from the old computer when you transfer it.
- There is a new utility to view the Internet connection status, and time available for off-line use.
- The new License Info dialog has a modern, user-friendly interface to view and manage your trial and license status.
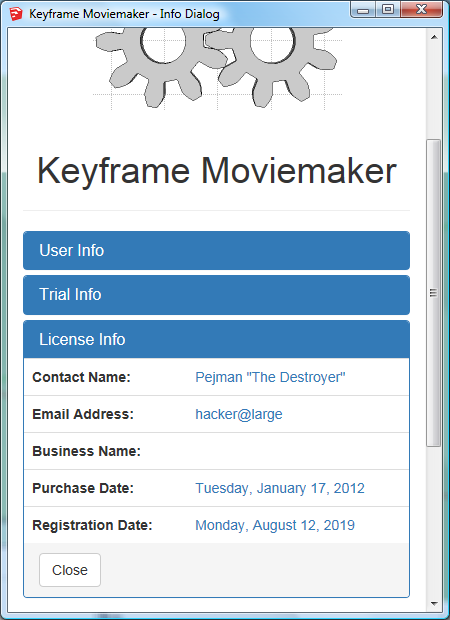
The new License Info dialog is accessed via the menu item, Plugins > Keyframe Moviemaker > License Info.... It organizes the information into three collapsible panels: User Info, Trial Info, and License Info.
Activation
Activation makes the software fully functional. You can activate the software by starting a free trial (via the Trial Info panel). Or by registering a license (via the License Info panel).
License Registration
The License Registration associates a license with a user. Open the License Info panel, enter the license key (serial number) in the text-field, and click the Register button. If all goes well, the license is registered to that user.
The license registration is per user (not per computer). If there are multiple users on the same computer, only one of them can use the license at a time. But since only one user can use the computer at a time, that should not be a big problem. If you have a Mac that is set up to emulate Windows, those are two different platforms, with two different users, so the license can be registered on only one of them at a time.
The registration covers all versions of SketchUp that the user has installed. After the license has been registered on one version of SketchUp, the system will find the license on all the other versions. Even if you enter an invalid serial number, if will still find the license that was previously registered by the user.
License Transfer
You will notice that in the License Info panel there is no Remove button. One of the best features of this new system is that you don't have to remove the license first before you transfer it to a new user. Just open the License Info dialog on the new computer, and enter your serial number, to register the new user. The old user is automatically deregistered.
There are a couple conditions that may block the license transfer. One, the license can not be registered any more often than once every two hours. Two, the license can not be registered to more than two different users in one week.
So, if you always transfer the license between the same two computers -- like a desktop and a laptop -- you can transfer it as often as every two hours, as many times as you want. However, if you are transferring the license to a third computer, then you will have to wait a week from the time you registered the license on the first computer.
Offline Use
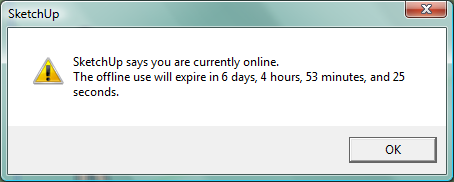
If you have a license, you can use the plugin offline for up to one week from the last time you used the plugin with an internet connection. If you have an active trial, but no license, then you can't use the plugin offline.
There is a new utility that reports your Offline Status. Access is via the menu item, Keyframe Moviemaker > Offline Status.... It will report if SketchUp thinks you are online or offline, and how much time is left to use the plugin offline.